God of War Sons of Sparta Beginner Guide: Start Strong
Use this God of War Sons of Sparta beginner guide to choose early skills, master parries, find collectibles, and spend Blood Orbs wisely on your journey.

Early Game: Make Movement Your First Upgrade
Button-mashing can get young Kratos hit even while his spear is connecting. This God of War Sons of Sparta beginner guide helps you spend your early resources, understand defensive tools, and explore without getting stuck chasing inaccessible treasures. Learn those systems early, and both ordinary encounters and boss fights become easier to read.
1. Prioritize Agile Evade II
Starting skills cost 500–1,000 Blood Orbs, earned from enemies and chests. Put Agile Evade II near the top of your shopping list: it extends your dodge roll, helping you escape attacks and move behind enemies.
Practice where the longer roll leaves you. Use it to clear an enemy’s attack, then turn around and strike while that enemy is still committed to its animation.
2. Adjust Readability and Controls Before Pushing Ahead
Open the settings menu if enemies, interactive objects, or interface text are difficult to distinguish. Available options include:
- High-contrast visuals and interface settings.
- Larger interface text and icons.
- Controller remapping and block-style adjustments.
- Aim assistance.
- Puzzle timing adjustments.
- Camera shake and controller vibration settings.
Change whichever option addresses the problem you are actually having. If an encounter remains frustrating, use the available difficulty adjustment.
3. Use Campsites to Review Your Setup
Campsites let you record progress and learn skills. Stop to check your purchases and equipment before heading back into dangerous territory.
The equipment menus separate a weapon or shield from its component slots. Inspect those slots individually, and check the equipped indicator after making a change. Your spear’s tip, shaft, and butt are all parts worth reviewing.
Official page: God of War Sons of Sparta (playstation.com)
Combat: Attack Without Giving Away Free Hits
4. Stop Expecting Normal Attacks to Interrupt Enemies
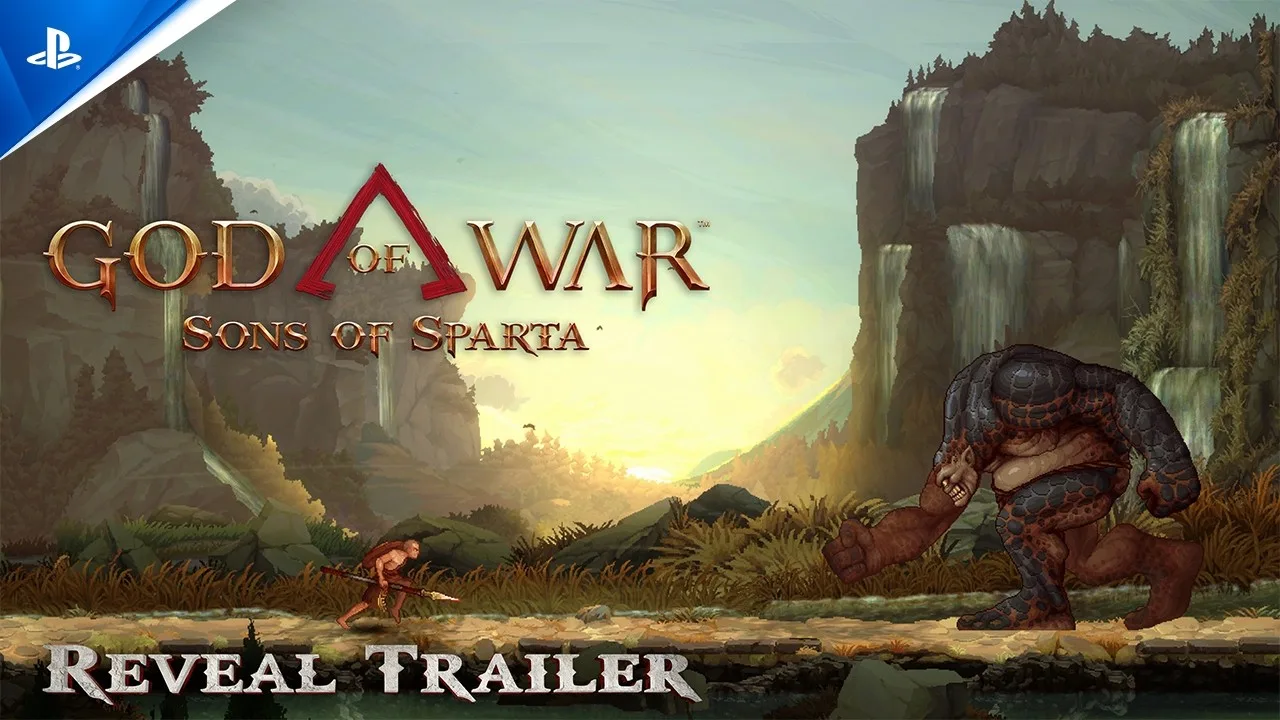
Ordinary spear hits do not reliably stop an enemy’s actions. Even a basic skeleton can finish its attack while you are landing a string of hits.
Keep your attention on the enemy’s animation throughout your offense. Break off when an attack begins, defend, and resume once the opening returns. Landing another hit is rarely worth accepting an avoidable blow.
5. Understand What Spartan Spirit Does
Hold R1 while attacking to use Spartan Spirit attacks, which consume the yellow Spirit meter. These attacks deal less damage than basic attacks, can stun enemies, and cause them to release health orbs.
Use them when you need their healing or stun benefits. Continue watching for incoming attacks while spending Spirit; do not assume every hit will interrupt the target.
Keep Blood Orbs and Spirit separate in your mind. Blood Orbs pay for purchases such as skills, while the yellow meter fuels Spirit attacks.
6. Block While Learning, Then Practice Parries
Blocking can convert incoming damage into recoverable gray health. Avoid taking further damage so that recoverable health can return.
A successful parry interrupts an enemy’s attack and creates an opening for your own hits, including during boss encounters. Practice against each new enemy type once you recognize its attack timing.
Unlock Laconian Revenge when you can to gain a counterattack after a parry. Until your timing feels comfortable, keep using ordinary guarding to learn the rhythm.
7. Dodge Red Attacks and Exploit Their Commitment
Red attacks cannot be handled with a block or parry. Dodge them.
When the attack’s direction allows it, roll behind the enemy and strike from the rear while its move continues. Watch your landing position: the useful opening comes from clearing the attack’s path.
Resources: Get More From Each Encounter
 Image: PlayStation
8. Take Brutal Kills When They Become Available
Brutal Kills award more resources than ordinary finishing blows. Use the finisher whenever you have the opportunity.
The enemy’s gray bar gradually decreases if you stop landing hits. Maintain pressure when it is safe, but keep defending against incoming attacks rather than taking damage to preserve that progress.
9. Balance Skill Purchases With Vermilion Globes
Vermilion Globes reveal collectible locations on the map, including locations in unexplored territory. Activating them costs Blood Orbs—the same currency used for skills.
Get your early movement upgrade, then consider putting Blood Orbs toward globes when exploration becomes your priority. Their map information helps you track down collectibles that are easy to overlook.
Avoid spending automatically whenever you can afford something. Check whether your next purchase should improve combat or help you locate rewards.
10. Check the Goals Tab Periodically
Goals award Blood Orbs for specific actions, including defeating set numbers of particular creatures. Some objectives involve killing 100 enemies of a specific type.
Review your progress after a stretch of exploration. If an objective is nearly complete, finish the relevant encounters while you are nearby instead of overlooking the reward.
Exploration: Mark Obstacles and Read the Environment
11. Mark Anything You Cannot Reach
Place a map marker when you find an inaccessible chest, collectible, or route. You have unlimited markers and can change their colors.
Choose a simple color scheme you will remember—for example, separate colors for treasure and blocked passages. Adjust colors so they remain visible against each region’s map background.
Once a location is marked, continue exploring. You can return to the exact spot without having to remember which ledge or room caught your attention.
12. Match Your Tool to the Puzzle
The bust can emit an energy beam to activate optical receptacles. Hold L2 to look, and inspect the room for the corresponding target.
When a puzzle involves a distant target, examine gaps and sightlines before assuming the route is blocked. Layered scenery can make the usable space difficult to read.
Use Vermilion Globes alongside your own markers: globe icons help locate collectibles, while your markers preserve the obstacles you personally encountered.
Optional Boss Spoilers: Alastor on Hard Mode
Alastor punishes rushed attacks, particularly once lasers and punches enter the fight. Spend available upgrade resources before attempting the encounter, and conserve bombs for the later phases.
13. Clear the Eyes and Keep the Opening Phase Controlled
Destroy the two eyes, then focus on the boss. For a cautious opening, dodge-roll through two attacks before attacking upward.
Save most of your bombs. Limit yourself to one during this opening phase so you retain resources for the harder sections.
14. Handle Lasers Before Looking for Damage
For the laser sequence, position yourself at the arena’s edge for the first set, then move slightly underneath the platform for the second. Watch both sets and correct your position if necessary.
Parrying can end the laser move immediately, but a failed attempt can cost substantial health. Use the positioning method while learning the fight.
During the second phase’s punch sequence, keep moving along the bottom level. Watch for the lower punch and dodge through it, then wait for a clear opening before attacking.
15. Spend Your Bombs in the Final Phase
The final phase begins with another laser sequence. Once it ends, use your saved bombs.
Watch for punches, remove the eyes, and attack the boss during its openings. The few seconds after the laser attack provide a useful damage window. Keep respecting the attack cycle even when the boss is close to defeat.
Local Co-op: Unlock the Separate Challenge Mode
16. Start With the Campaign, Then Try the Roguelite Challenges
The main campaign is single-player. Local co-op is available in the separate roguelite challenge mode, which normally unlocks after completing the story.
You can also unlock that mode early by entering this sequence at the start menu:
Up, Up, Down, Down, Left, Right, Left, Right, L1, R1, touch pad
The challenge-mode option then appears in the menu. Spend time learning Kratos’s weapons and enemy patterns in the campaign before taking on those challenges.
Continue with
 God of War Sons of Sparta Easy Mode: Boy DifficultyGod of War Sons of Sparta easy mode is called Boy. Learn how the difficulty options compare, why bosses can still be tough, and how to prepare for fights.
More in Guide
God of War Sons of Sparta Gameplay: Combat and Tips
Explore God of War Sons of Sparta gameplay with tips for spear combat, gear, traversal, healing, and surviving the Pit of Agonies. Plan your next run now.

God of War Sons of Sparta How Long to Beat: All Times
Compare story, optional content, and full completion times in God of War Sons of Sparta, then plan your Platinum and cut down on backtracking.
God of War Sons of Sparta Reddit: Co-Op and Editions
God of War Sons of Sparta reddit searches made simple: see how co-op works, unlock the Pit of Agonies, compare editions, and avoid outdated launch advice.
Continue exploring
Join the community
Official channels for news, updates and player help: